Private Trees on FamilySearch Are Here!
You talked and FamilySearch did listen! Not everyone likes the idea of one big tree, such as the one FamilySearch has on its website. So, they have added a feature for you to upload your private tree. Here is how to do it.
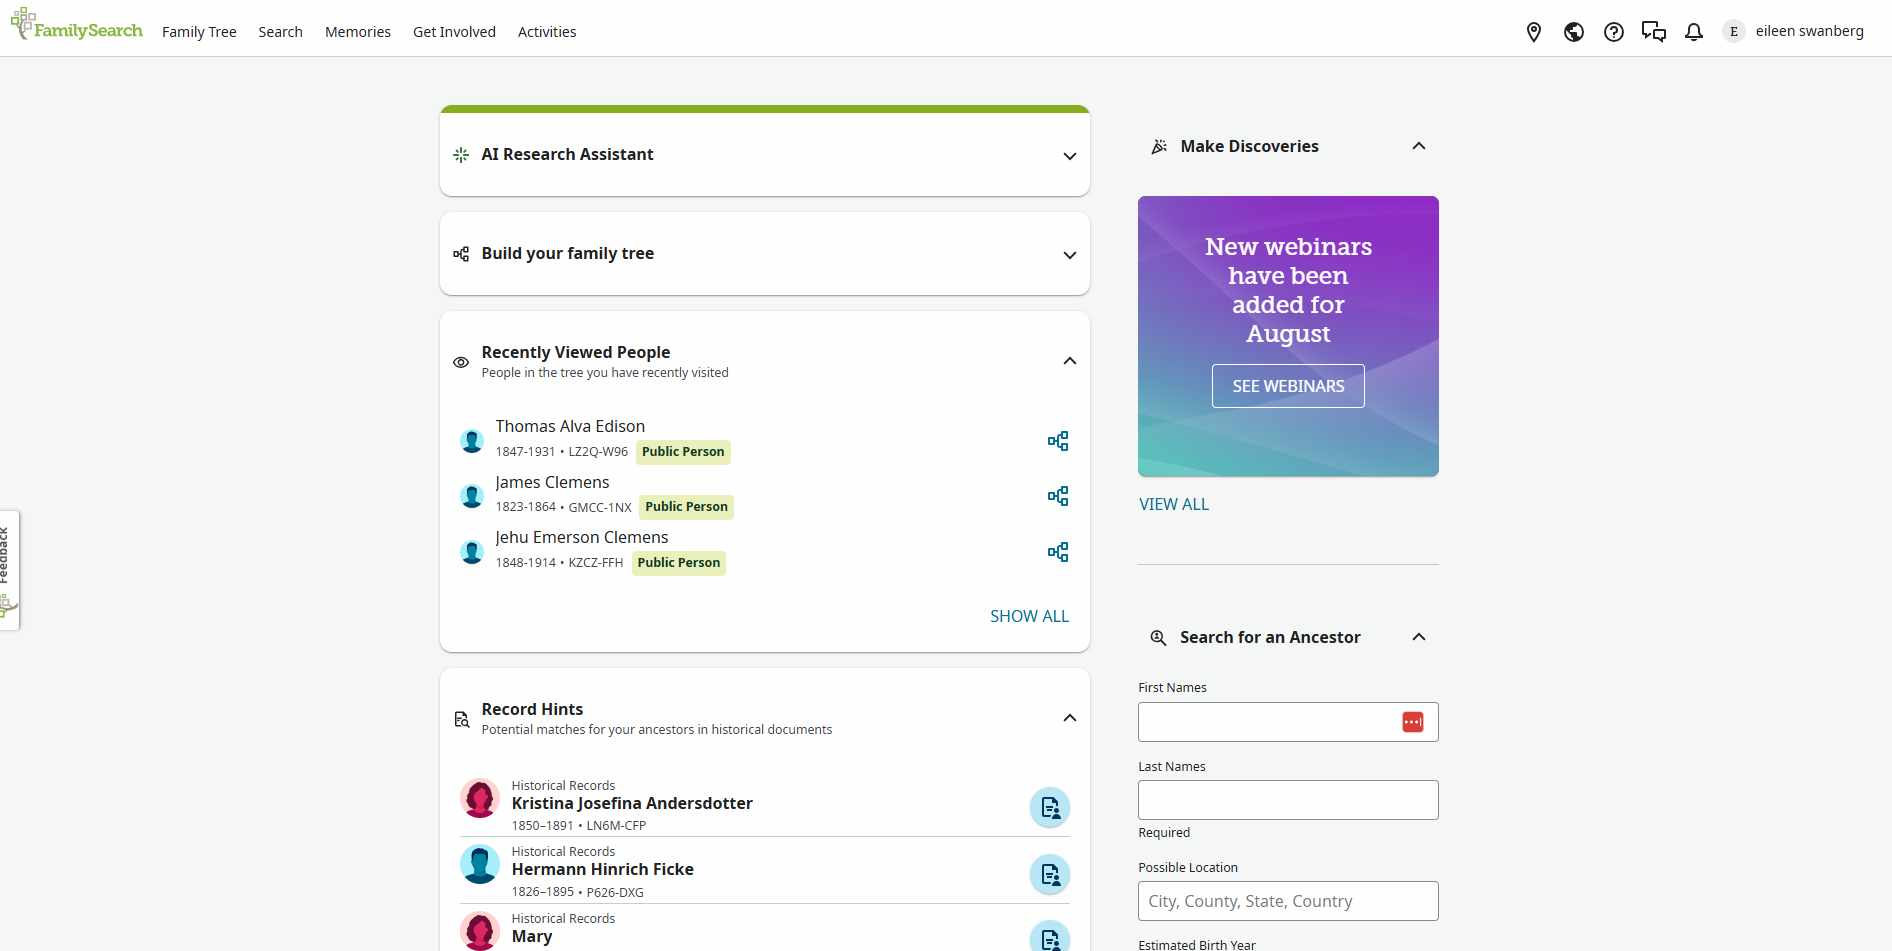
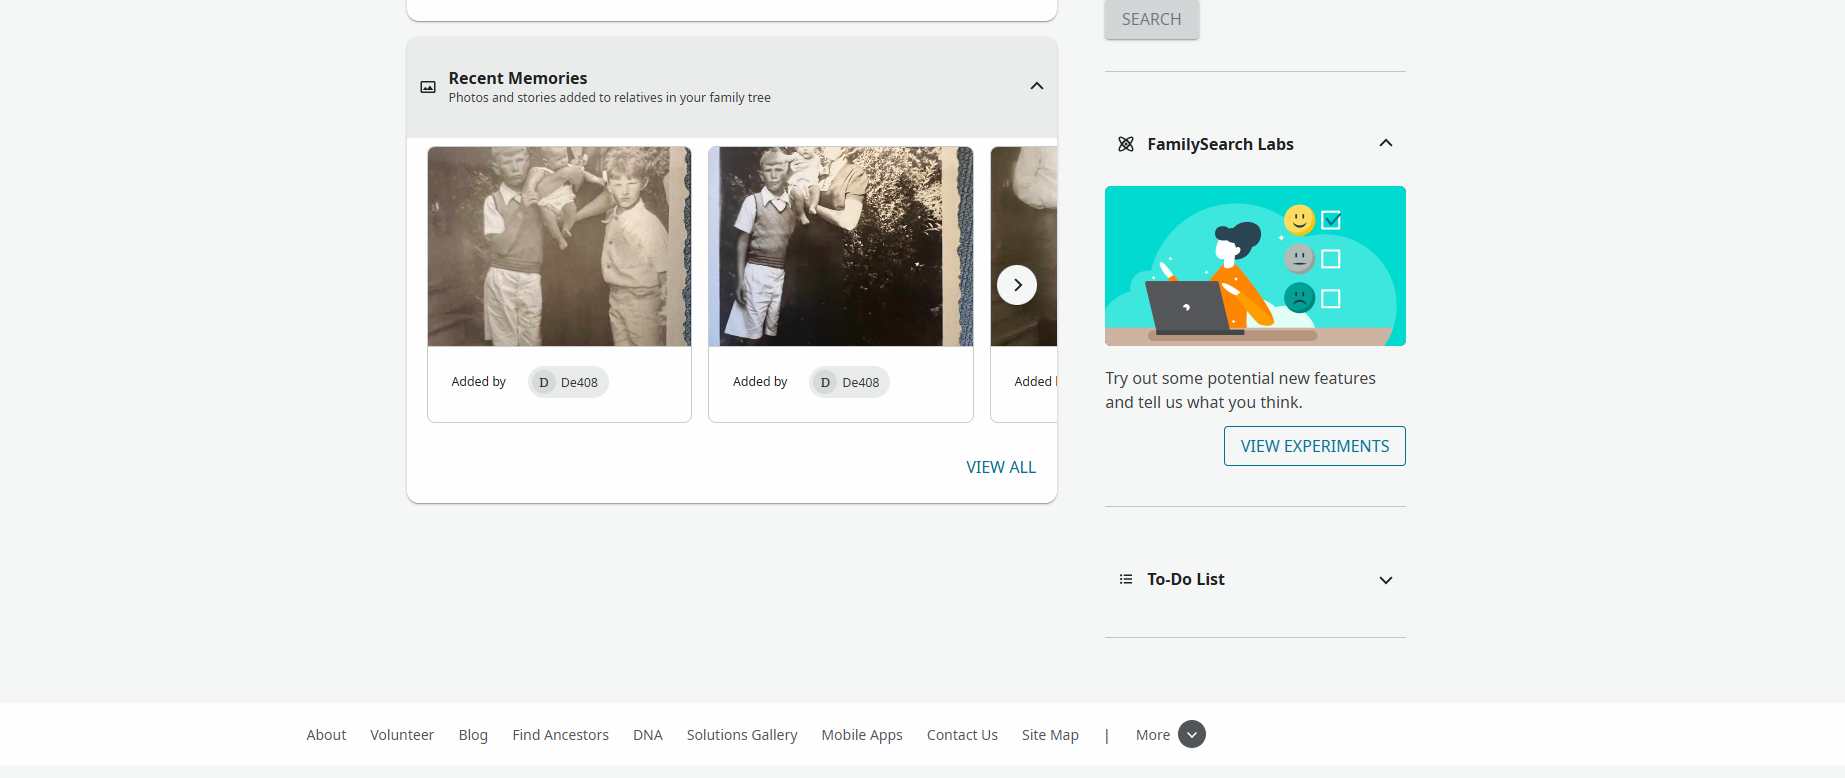
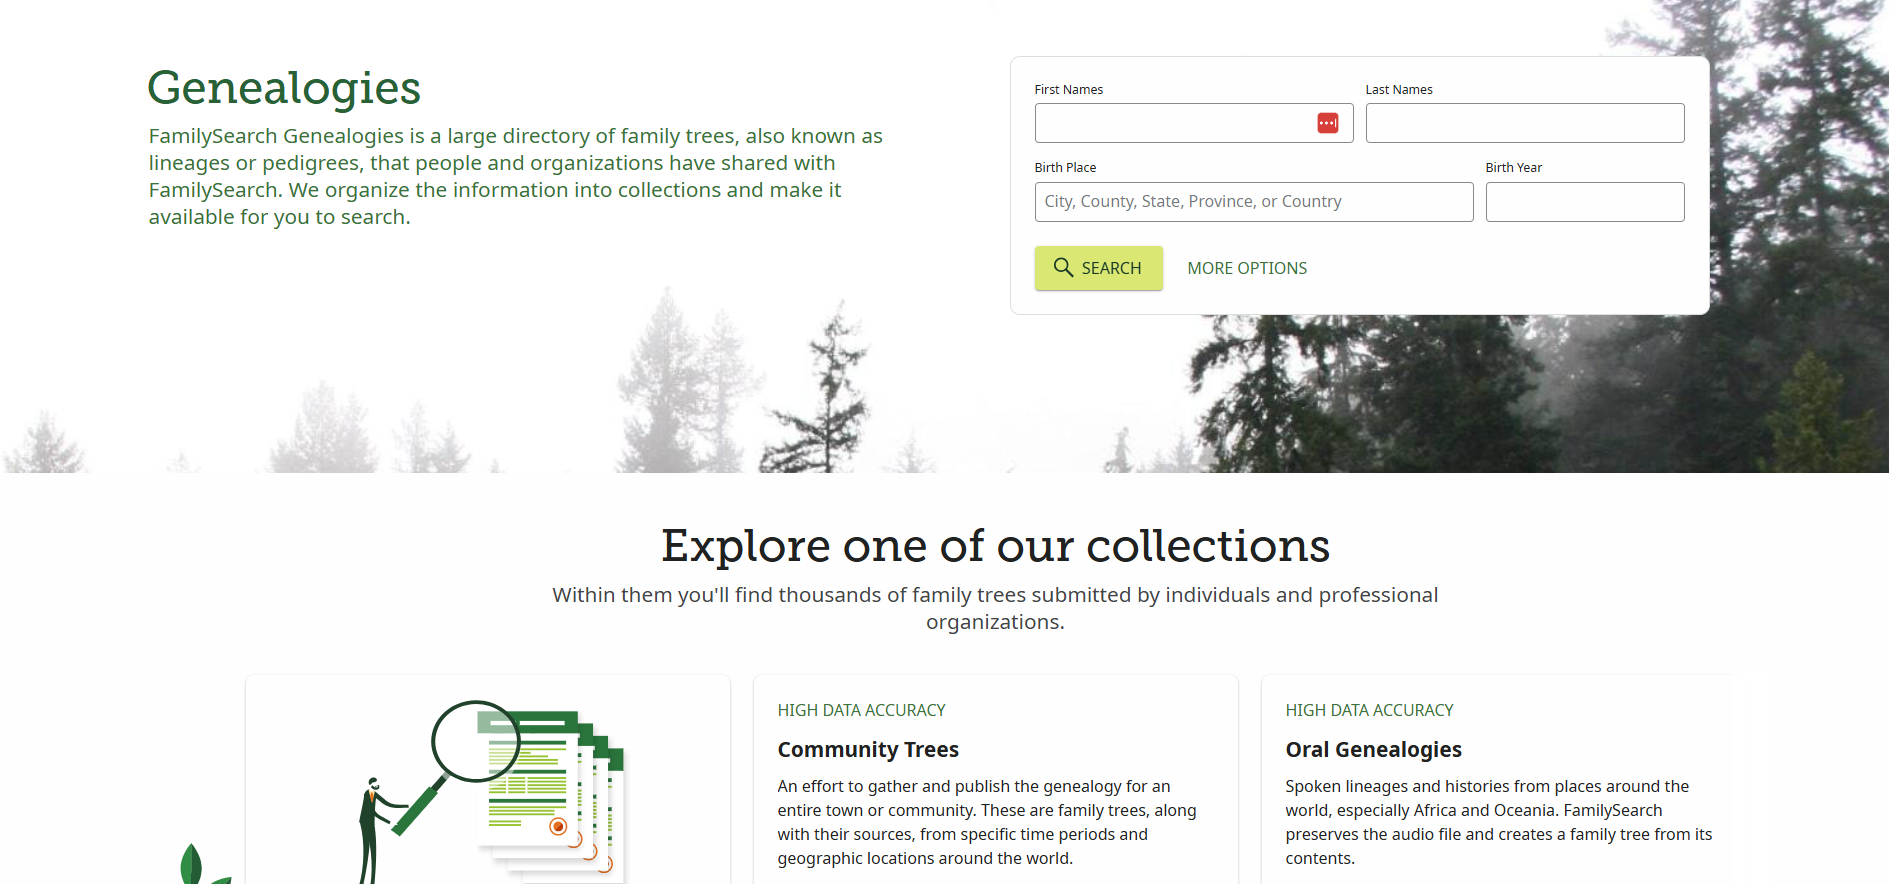
Once you sign in you see your home page. It was a bit too big for one screenshot, so I had to take two so you could see everything. Now, this is my homepage, so you are seeing my “stuff” (how is the for a professional description?!). I want to show you where you can now upload your private tree(s) to FamilySearch.
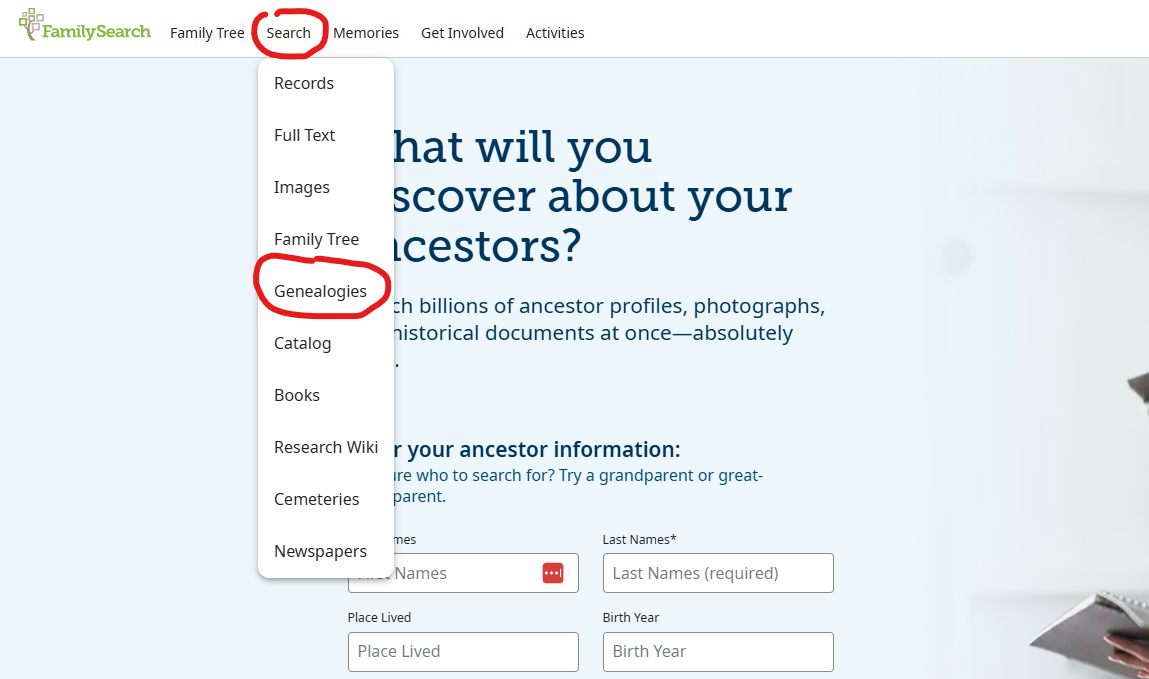
Go to the Search option on the banner and select “Genealogies.”
Once you click on “Genealogies” you come to the homepage for that option. Again, I have to show you in two screenshots. Towards the bottom of the page you will see “Upload Your Individual Tree.” Click on that to start the process of bringing your private tree to FamilySearch!
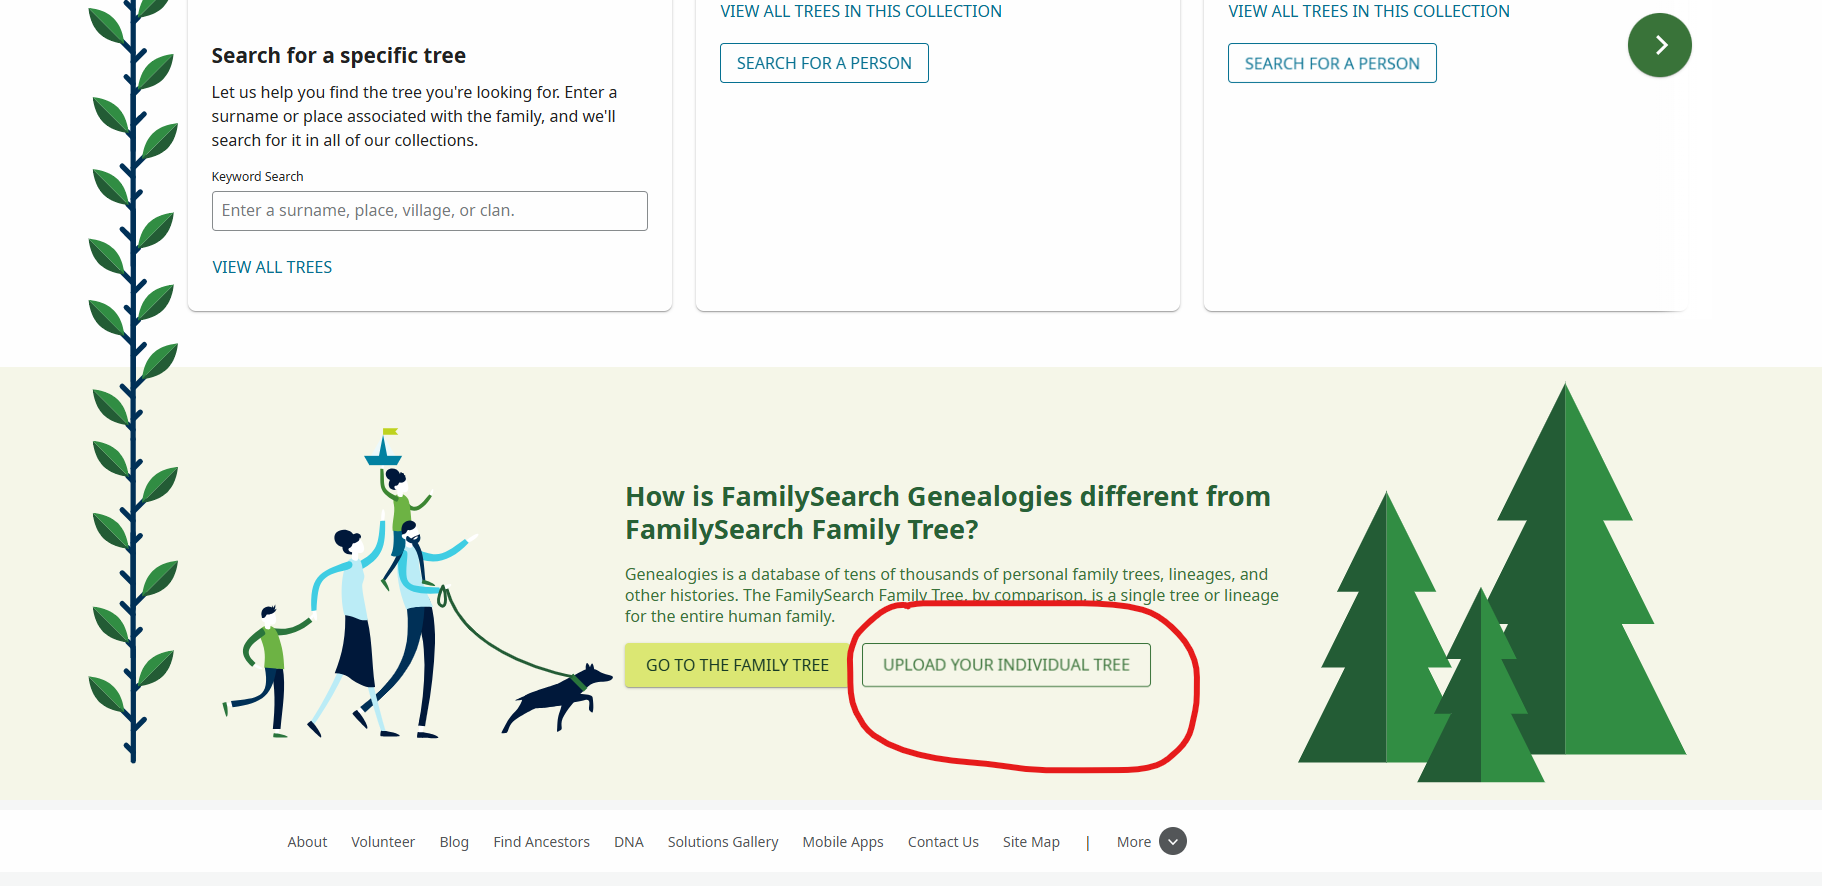
You will need to upload your GEDCOM (Genealogical Data Communication) of a family tree now. I am not going to get into this too deeply, but here is the shortened version. To start, you need to have your tree built out in another program, whether it is an online platform such as Ancestry, or a software platform such as Family Tree Maker. From there, you need to figure out how to get to the page to be able to export your tree (it differs for every program). Not to worry though! It does not erase it from where you have it, it just makes a copy in the format called GEDCOM that was created by FamilySearch many years ago. Any genealogical program can read a GEDCOM, which was the point of creating it in the first place. It allows anyone to share their data from a tree with another program. The key word being data here. It does not download the photos, documents, etc. that you may have added to your tree. But it does download the names, dates, etc. that are the data you found doing your research.
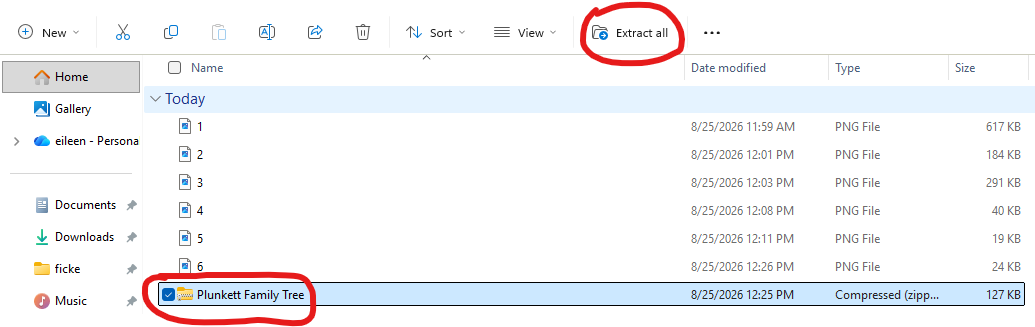
Once you download your GEDCOM to your computer, it will be in a Zip file (Zip files are for what could be very large files so that they do not take up a lot of room on your computer). It needs to be “extracted” so it can be uploaded then. I use a PC, so am not sure what it would look like on an Apple product. You need to select the Zip file you want for the “Extract All” to show up on the top banner. Select “Extract All” and a new page will show up asking where you want to save it. I always save it to the Download folder with my Zip folder of the GEDCOM. You can save it wherever you want, of course!
Now, I go back to the page where it told me to “Upload GEDCOM” and click on that. I follow the screen directions and tell it where to find my downloaded GEDCOM.
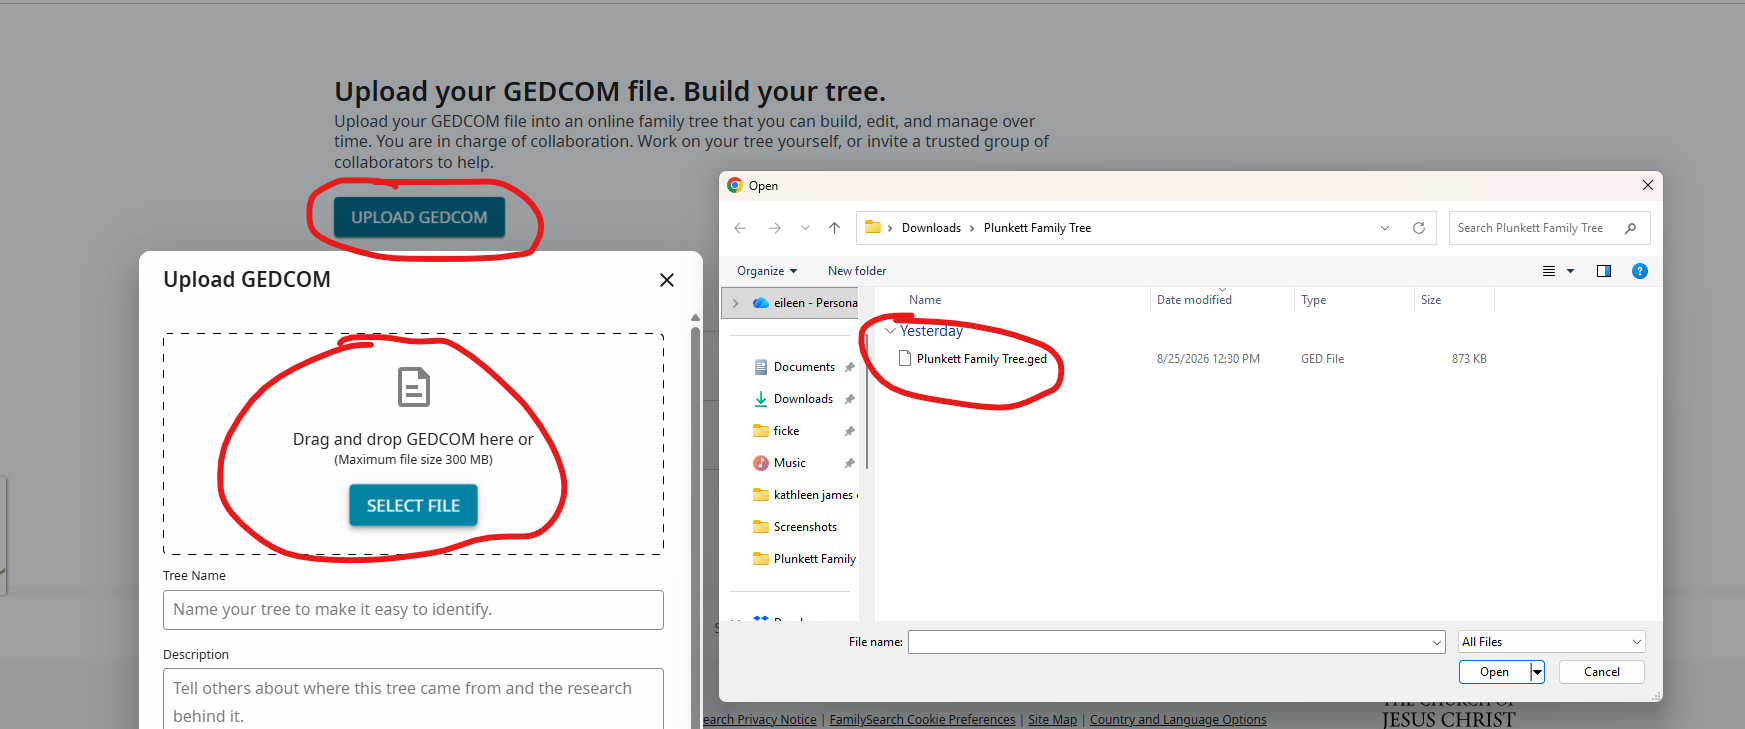
As you see below, my Plunkett tree is still uploading, but it is uploading! Once it is completed, I will have my Plunkett tree that I have on Ancestry uploaded to FamilySearch.
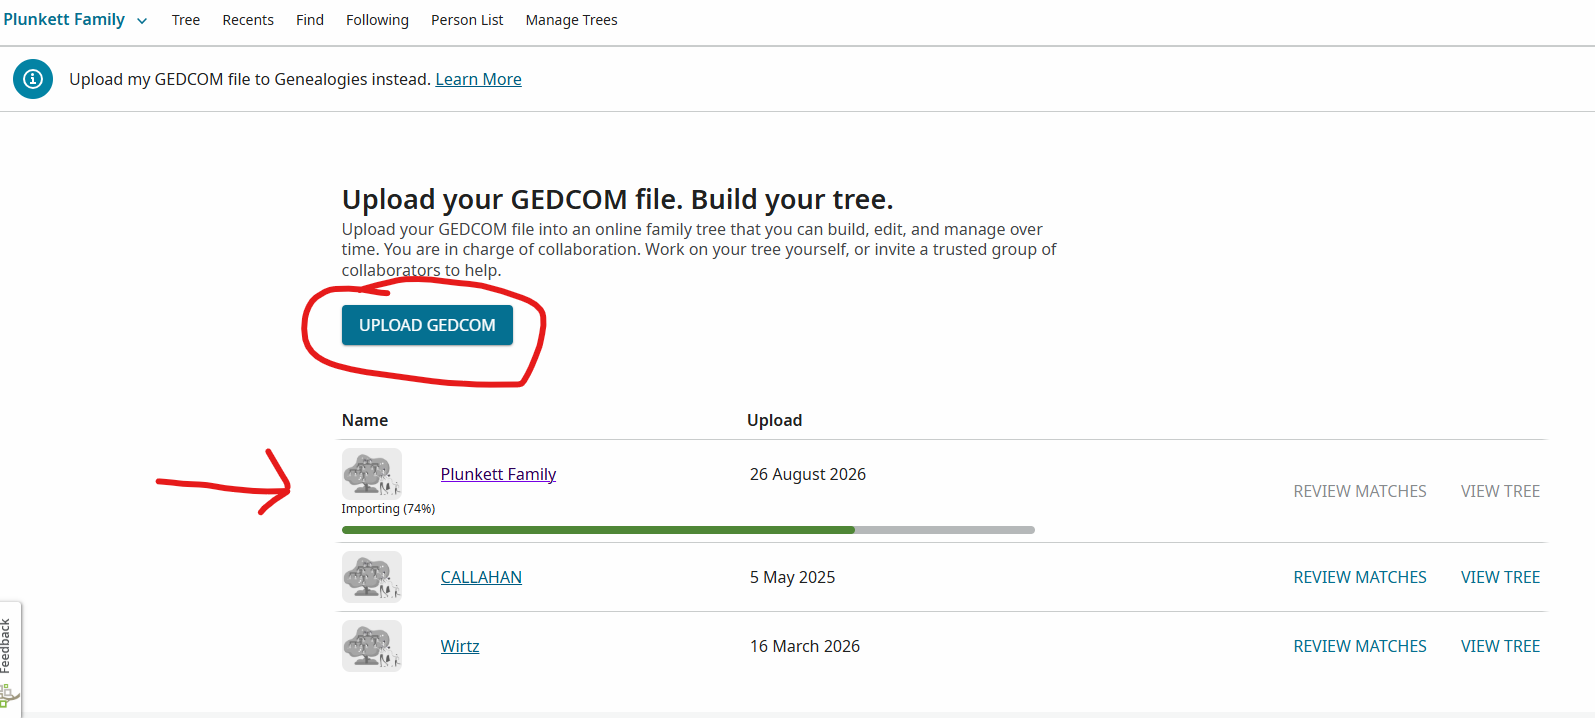
As I said earlier, this is a private tree. The information is not added to the one big tree on FamilySearch. It is your private tree. When you click on “View Tree” for the tree you want to see, it will bring you right to that tree you uploaded. If it is a brand-new tree, such as my Plunkett tree here, it first wants you to set up a Starting Person. You can select yourself or anyone else you want.
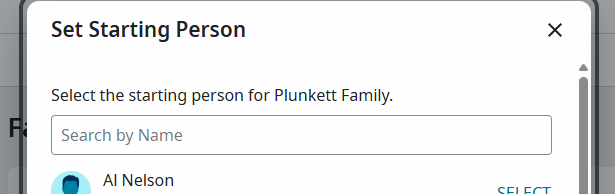
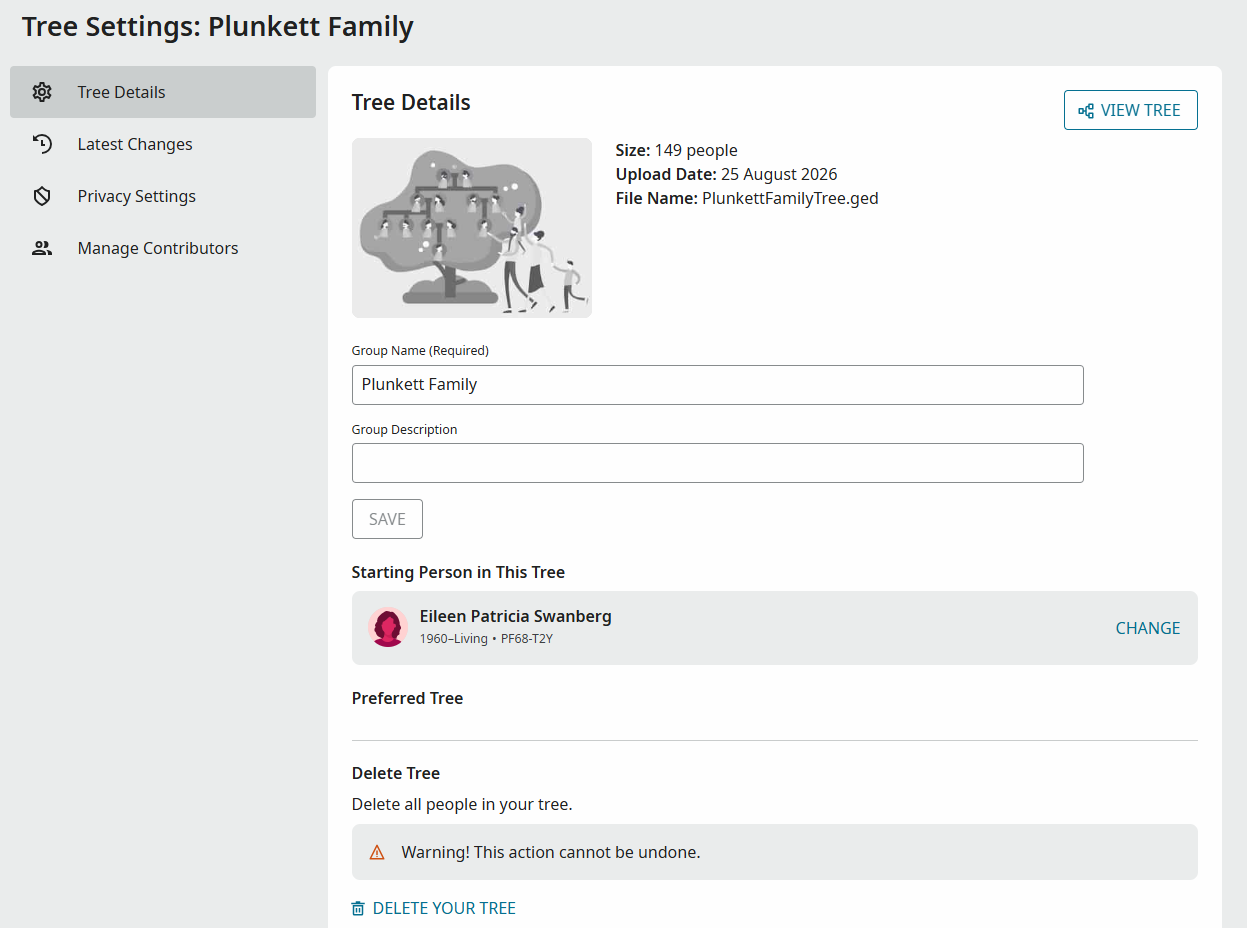
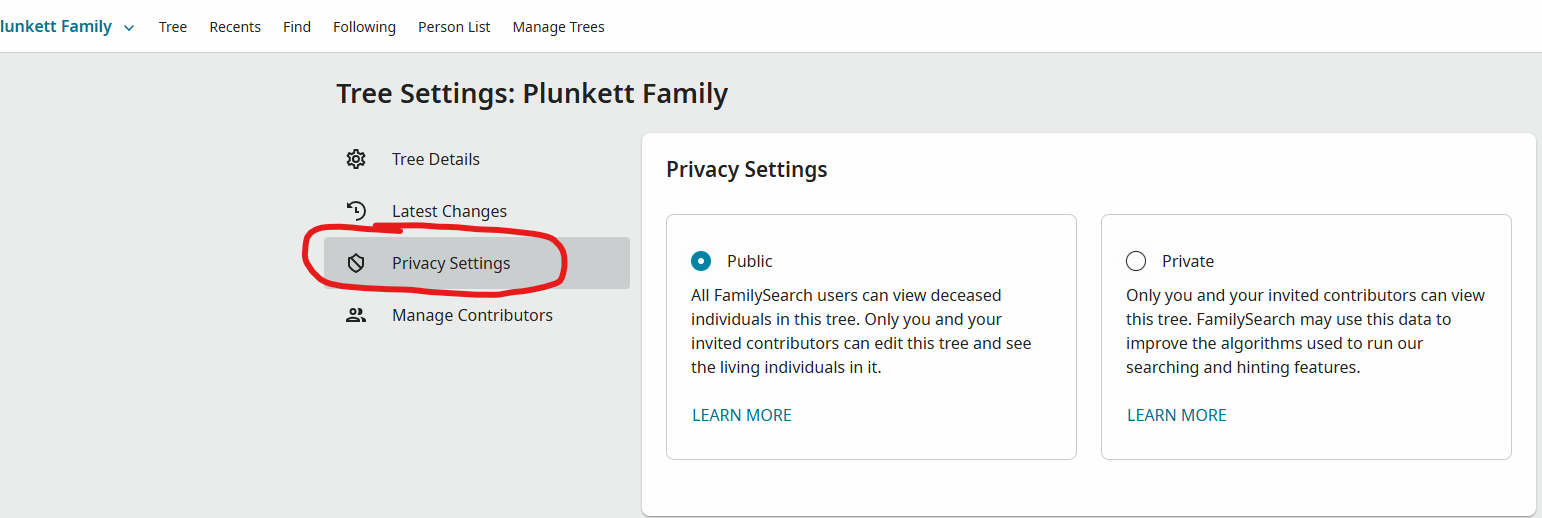
Once you select your Starting Person, you are then able to set up some other information on the tree you just uploaded. One important piece you need to address is the Privacy Settings. If you don’t make it Private, it becomes a Public tree, and anyone can see the deceased people on the tree. They can’t make changes, but they will be able to see it though. It is your choice, but if you want it to be completely private, you need to go into Privacy Settings and change the option to Private.
If you are no longer on the initial set up page, you can get to the “Privacy Settings” by clicking on “Tree Details” when the family tree is displayed.
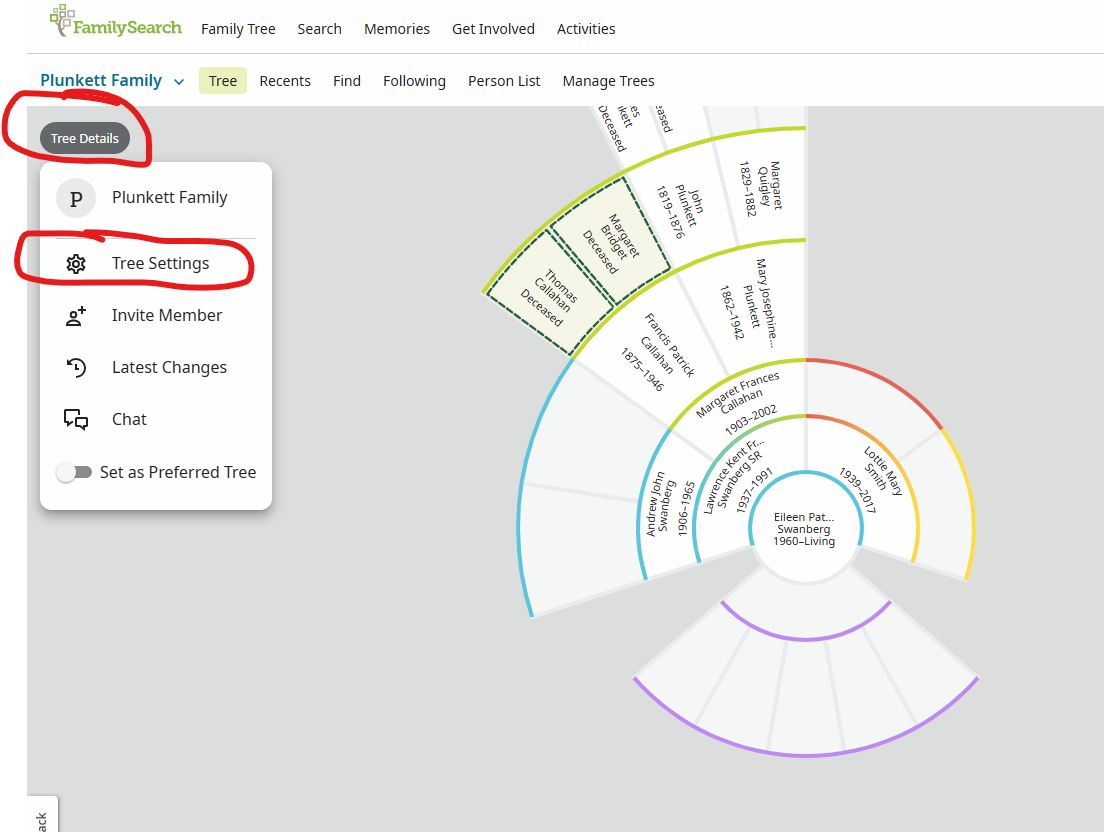
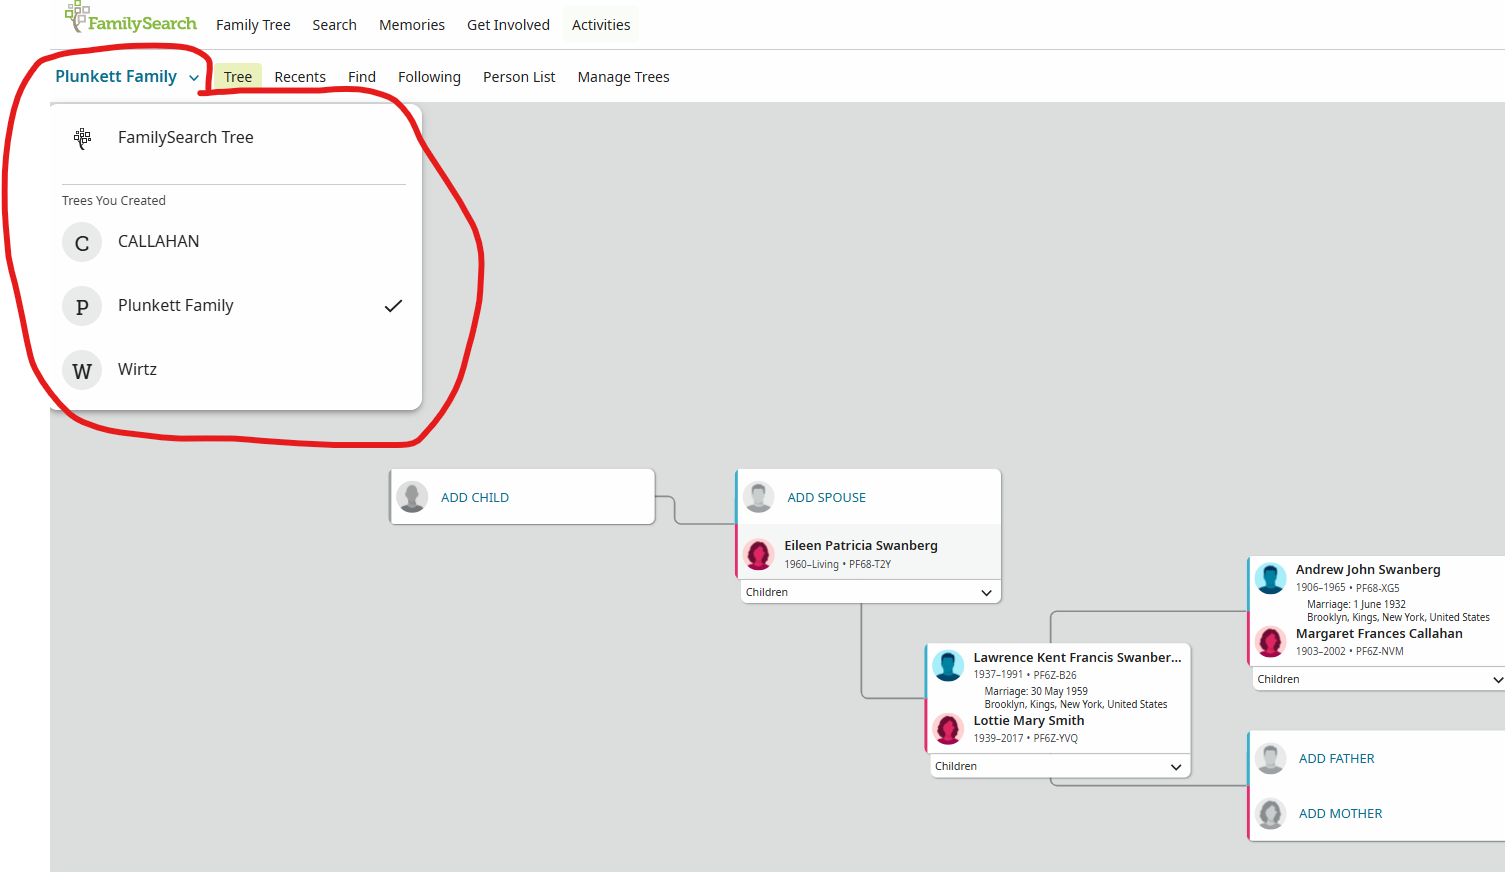
From the page with your private tree, you can easily navigate to other private trees or back to the one big tree by making your selection in the dropdown menu you will get to if you click the down arrow next to the tree name.
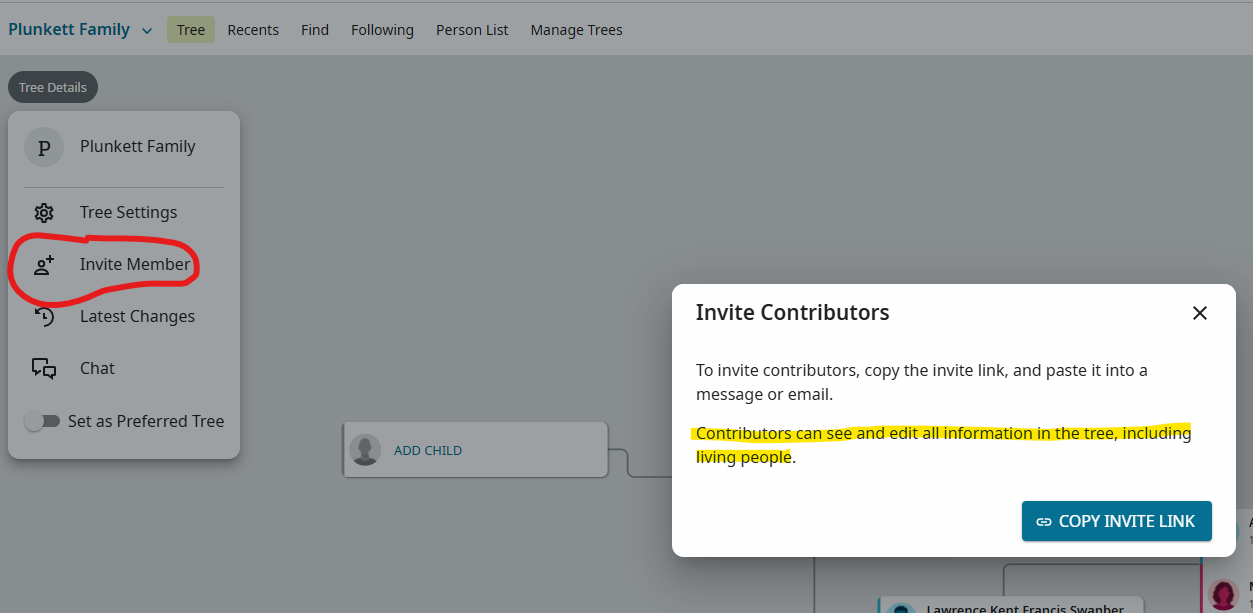
You can invite others to be able to view your private tree. They will also be able to make changes to your tree as well as see any living people you have on your tree. But, since you are controlling who you are inviting, you are able to control who makes changes to your private tree. If you don’t want them to be able to see living people or make changes, don’t invite them. It’s that easy!
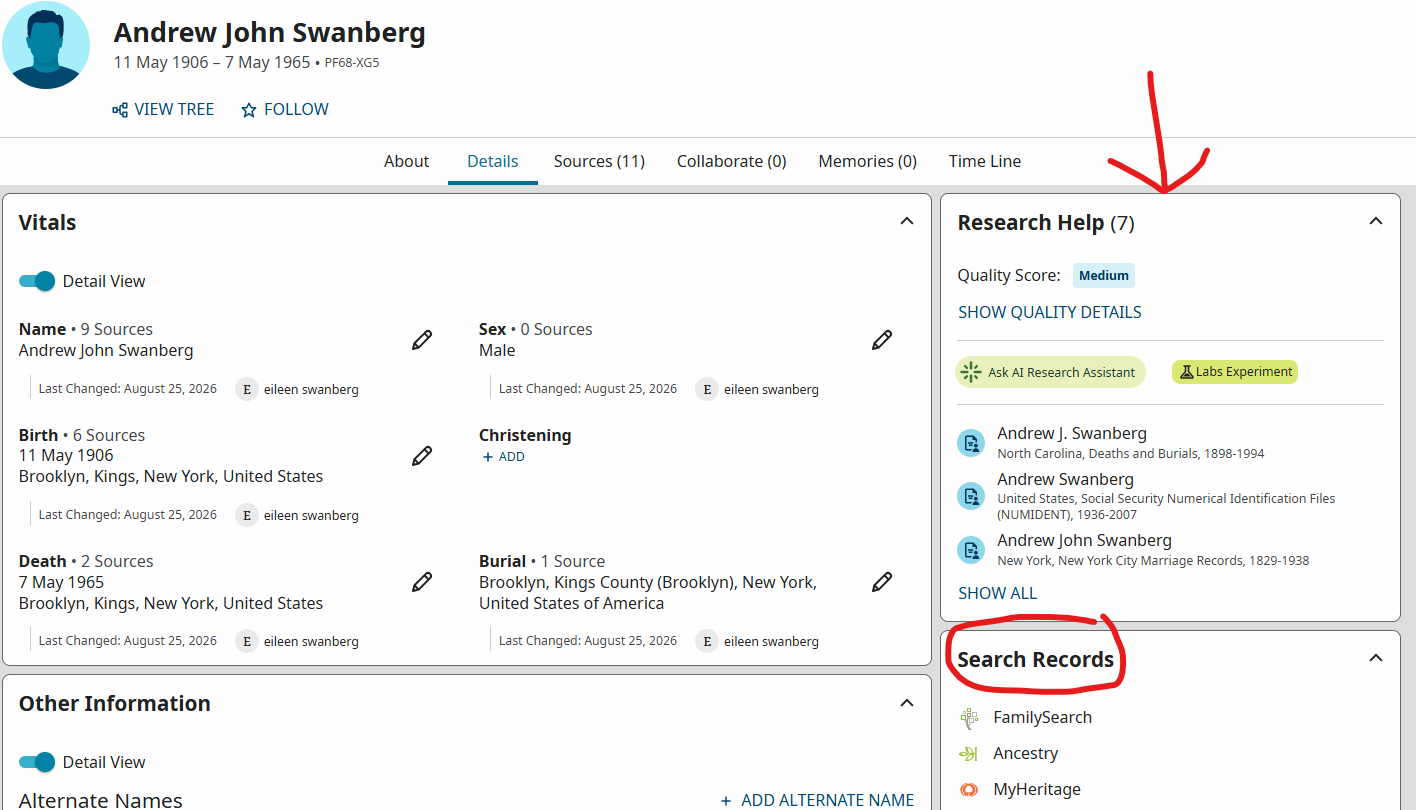
On the tree, I went to my grandfather, Andrew Swanberg’s page and it looks exactly like what you would see on the one big tree. That includes Research Help and Search Records. The only difference is that it is a truly private tree and no one but myself and who I invite can view it. If I had left it as Public under Privacy Settings, anyone would be able to see him, but not do anything with research or adding memories.
So, you now have an option to upload your personal family trees to FamilySearch and keep them completely private, preventing others from making changes to the tree. The only drawback is that you need to have your tree in another program, and that will cost you money. You can subscribe to a website for a short period of time (such as 6 months or a trial period) and get your work started there. Then download the GEDCOM and upload it to FamilySearch and finish your research from there. As FamilySearch help pages state: